Showing posts with label Linux Ubuntu. Show all posts

Friday, November 24, 2017

Change default boot OS in Ubuntu Grub from Linux to Window


Ref: http://www.linuxandubuntu.com/home/how-to-change-boot-order-set-default-boot-os-in-ubuntu-14-10-15-04-linux-mint-or-other-derivatives

Brief of command line:
1. Find out the entry ID list.
qyang@lubuntu-laptop:~$ grep menuentry /boot/grub/grub.cfg
2. Change the default boot id.
qyang@lubuntu-laptop:~$ sudo vi /etc/default/grub
3. Upgrade grub.cfg via 'update-grub'.
qyang@lubuntu-laptop:~$ sudo update-grub

Details in command line:

qyang@lubuntu-laptop:~$ grep menuentry /boot/grub/grub.cfg
if [ x"${feature_menuentry_id}" = xy ]; then
  menuentry_id_option="--id"
  menuentry_id_option=""
export menuentry_id_option
menuentry 'Ubuntu' --class ubuntu --class gnu-linux --class gnu --class os $menuentry_id_option 'gnulinux-simple-8acc81f2-51d4-44ec-94ac-ab13858d5855' {
submenu 'Advanced options for Ubuntu' $menuentry_id_option 'gnulinux-advanced-8acc81f2-51d4-44ec-94ac-ab13858d5855' {
menuentry 'Ubuntu, with Linux 3.19.0-73-generic' --class ubuntu --class gnu-linux --class gnu --class os $menuentry_id_option 'gnulinux-3.19.0-73-generic-advanced-8acc81f2-51d4-44ec-94ac-ab13858d5855' {
menuentry 'Ubuntu, with Linux 3.19.0-73-generic (recovery mode)' --class ubuntu --class gnu-linux --class gnu --class os $menuentry_id_option 'gnulinux-3.19.0-73-generic-recovery-8acc81f2-51d4-44ec-94ac-ab13858d5855' {
menuentry 'Ubuntu, with Linux 3.19.0-69-generic' --class ubuntu --class gnu-linux --class gnu --class os $menuentry_id_option 'gnulinux-3.19.0-69-generic-advanced-8acc81f2-51d4-44ec-94ac-ab13858d5855' {
menuentry 'Ubuntu, with Linux 3.19.0-69-generic (recovery mode)' --class ubuntu --class gnu-linux --class gnu --class os $menuentry_id_option 'gnulinux-3.19.0-69-generic-recovery-8acc81f2-51d4-44ec-94ac-ab13858d5855' {
menuentry 'Ubuntu, with Linux 3.19.0-56-generic' --class ubuntu --class gnu-linux --class gnu --class os $menuentry_id_option 'gnulinux-3.19.0-56-generic-advanced-8acc81f2-51d4-44ec-94ac-ab13858d5855' {
menuentry 'Ubuntu, with Linux 3.19.0-56-generic (recovery mode)' --class ubuntu --class gnu-linux --class gnu --class os $menuentry_id_option 'gnulinux-3.19.0-56-generic-recovery-8acc81f2-51d4-44ec-94ac-ab13858d5855' {
menuentry 'Ubuntu, with Linux 3.19.0-51-generic' --class ubuntu --class gnu-linux --class gnu --class os $menuentry_id_option 'gnulinux-3.19.0-51-generic-advanced-8acc81f2-51d4-44ec-94ac-ab13858d5855' {
menuentry 'Ubuntu, with Linux 3.19.0-51-generic (recovery mode)' --class ubuntu --class gnu-linux --class gnu --class os $menuentry_id_option 'gnulinux-3.19.0-51-generic-recovery-8acc81f2-51d4-44ec-94ac-ab13858d5855' {
menuentry 'Ubuntu, with Linux 3.19.0-37-generic' --class ubuntu --class gnu-linux --class gnu --class os $menuentry_id_option 'gnulinux-3.19.0-37-generic-advanced-8acc81f2-51d4-44ec-94ac-ab13858d5855' {
menuentry 'Ubuntu, with Linux 3.19.0-37-generic (recovery mode)' --class ubuntu --class gnu-linux --class gnu --class os $menuentry_id_option 'gnulinux-3.19.0-37-generic-recovery-8acc81f2-51d4-44ec-94ac-ab13858d5855' {
menuentry 'Ubuntu, with Linux 3.19.0-33-generic' --class ubuntu --class gnu-linux --class gnu --class os $menuentry_id_option 'gnulinux-3.19.0-33-generic-advanced-8acc81f2-51d4-44ec-94ac-ab13858d5855' {
menuentry 'Ubuntu, with Linux 3.19.0-33-generic (recovery mode)' --class ubuntu --class gnu-linux --class gnu --class os $menuentry_id_option 'gnulinux-3.19.0-33-generic-recovery-8acc81f2-51d4-44ec-94ac-ab13858d5855' {
menuentry 'Ubuntu, with Linux 3.19.0-32-generic' --class ubuntu --class gnu-linux --class gnu --class os $menuentry_id_option 'gnulinux-3.19.0-32-generic-advanced-8acc81f2-51d4-44ec-94ac-ab13858d5855' {
menuentry 'Ubuntu, with Linux 3.19.0-32-generic (recovery mode)' --class ubuntu --class gnu-linux --class gnu --class os $menuentry_id_option 'gnulinux-3.19.0-32-generic-recovery-8acc81f2-51d4-44ec-94ac-ab13858d5855' {
menuentry 'Ubuntu, with Linux 3.19.0-31-generic' --class ubuntu --class gnu-linux --class gnu --class os $menuentry_id_option 'gnulinux-3.19.0-31-generic-advanced-8acc81f2-51d4-44ec-94ac-ab13858d5855' {
menuentry 'Ubuntu, with Linux 3.19.0-31-generic (recovery mode)' --class ubuntu --class gnu-linux --class gnu --class os $menuentry_id_option 'gnulinux-3.19.0-31-generic-recovery-8acc81f2-51d4-44ec-94ac-ab13858d5855' {
menuentry 'Ubuntu, with Linux 3.19.0-30-generic' --class ubuntu --class gnu-linux --class gnu --class os $menuentry_id_option 'gnulinux-3.19.0-30-generic-advanced-8acc81f2-51d4-44ec-94ac-ab13858d5855' {
menuentry 'Ubuntu, with Linux 3.19.0-30-generic (recovery mode)' --class ubuntu --class gnu-linux --class gnu --class os $menuentry_id_option 'gnulinux-3.19.0-30-generic-recovery-8acc81f2-51d4-44ec-94ac-ab13858d5855' {
menuentry 'Memory test (memtest86+)' {
menuentry 'Memory test (memtest86+, serial console 115200)' {
menuentry 'Windows 7 (loader) (on /dev/sda1)' --class windows --class os $menuentry_id_option 'osprober-chain-7E980FF3980FA8AB' {
menuentry 'Windows 7 (loader) (on /dev/sda2)' --class windows --class os $menuentry_id_option 'osprober-chain-48D0359CD0359164' {
menuentry 'Windows Recovery Environment (loader) (on /dev/sda3)' --class windows --class os $menuentry_id_option 'osprober-chain-4A765B93765B7F1F' {


qyang@lubuntu-laptop:~$ sudo update-grub
[sudo] password for qyang:
Generating grub configuration file ...
Found linux image: /boot/vmlinuz-3.19.0-73-generic
Found initrd image: /boot/initrd.img-3.19.0-73-generic
Found linux image: /boot/vmlinuz-3.19.0-69-generic
Found initrd image: /boot/initrd.img-3.19.0-69-generic
Found linux image: /boot/vmlinuz-3.19.0-56-generic
Found initrd image: /boot/initrd.img-3.19.0-56-generic
Found linux image: /boot/vmlinuz-3.19.0-51-generic
Found initrd image: /boot/initrd.img-3.19.0-51-generic
Found linux image: /boot/vmlinuz-3.19.0-37-generic
Found initrd image: /boot/initrd.img-3.19.0-37-generic
Found linux image: /boot/vmlinuz-3.19.0-33-generic
Found initrd image: /boot/initrd.img-3.19.0-33-generic
Found linux image: /boot/vmlinuz-3.19.0-32-generic
Found initrd image: /boot/initrd.img-3.19.0-32-generic
Found linux image: /boot/vmlinuz-3.19.0-31-generic
Found initrd image: /boot/initrd.img-3.19.0-31-generic
Found linux image: /boot/vmlinuz-3.19.0-30-generic
Found initrd image: /boot/initrd.img-3.19.0-30-generic
Found memtest86+ image: /boot/memtest86+.elf
Found memtest86+ image: /boot/memtest86+.bin
Found Windows 7 (loader) on /dev/sda1
Found Windows 7 (loader) on /dev/sda2
Found Windows Recovery Environment (loader) on /dev/sda4
done


qyang@lubuntu-laptop:~$ sudo fdisk -l
[sudo] password for qyang:

Disk /dev/sda: 465.8 GiB, 500107862016 bytes, 976773168 sectors
Units: sectors of 1 * 512 = 512 bytes
Sector size (logical/physical): 512 bytes / 512 bytes
I/O size (minimum/optimal): 512 bytes / 512 bytes
Disklabel type: dos
Disk identifier: 0x1cb42612

Device     Boot     Start       End   Sectors   Size Id Type
/dev/sda1  *         2048   3074047   3072000   1.5G 27 Hidden NTFS WinRE
/dev/sda2         3074048 207874047 204800000  97.7G  7 HPFS/NTFS/exFAT
/dev/sda3       207874048 952238079 744364032   355G  5 Extended
/dev/sda4       952238080 976773119  24535040  11.7G 17 Hidden HPFS/NTFS
/dev/sda5       207876096 576516095 368640000 175.8G  7 HPFS/NTFS/exFAT
/dev/sda6       584908800 952238079 367329280 175.2G 83 Linux
/dev/sda7       576518144 584906751   8388608     4G 82 Linux swap / Solaris

Partition table entries are not in disk order.

Tuesday, June 6, 2017

Set JAVA_HOME in Ubuntu


Ref from 'askubuntu.com'


Three files you could edit, '/etc/environment' is the one prefered in web post:
/etc/environment
/etc/profile
~/.bashrc

But I chose adding file: /etc/profile.d/dnm-build-envsetting.sh

- Reboot pc, and all environments variables settings remains.
        qyang@lgm-pc:~$ cat /etc/environment
        PATH="/usr/local/sbin:/usr/local/bin:/usr/sbin:/usr/bin:/sbin:/bin:/usr/games:/usr/local/games"
        qyang@lgm-pc:~$ cat /etc/profile.d/dnm-build-envsetting.sh
        # Some environmental variables required for DmM builder to work for android build.
        # 2017-JUN-09
        JAVA_HOME=/usr/lib/jvm/java-8-openjdk-amd64
        ANDROID_HOME=/home/qyang/sandbox/android-sdk-linux
        QTDIR=/home/qyang/sandbox/qt-everywhere-opensource-4.8.7
        export JAVA_HOME
        export ANDROID_HOME
        export QTDIR


My old settings:
yang@lgm-pc:~/testsetupscript$ cat /etc/environment
PATH="/usr/local/sbin:/usr/local/bin:/usr/sbin:/usr/bin:/sbin:/bin:/usr/games:/usr/local/games"
qyang@lgm-pc:~/testsetupscript$ cat /etc/profile
# /etc/profile: system-wide .profile file for the Bourne shell (sh(1))
# and Bourne compatible shells (bash(1), ksh(1), ash(1), ...).

if [ "$PS1" ]; then
  if [ "$BASH" ] && [ "$BASH" != "/bin/sh" ]; then
    # The file bash.bashrc already sets the default PS1.
    # PS1='\h:\w\$ '
    if [ -f /etc/bash.bashrc ]; then
      . /etc/bash.bashrc
    fi
  else
    if [ "`id -u`" -eq 0 ]; then
      PS1='# '
    else
      PS1='$ '
    fi
  fi
fi

# The default umask is now handled by pam_umask.
# See pam_umask(8) and /etc/login.defs.

if [ -d /etc/profile.d ]; then
  for i in /etc/profile.d/*.sh; do
    if [ -r $i ]; then
      . $i
    fi
  done
  unset i
fi

JAVA_HOME=/usr/local/java/jdk1.8.0_25
PATH=$PATH:$HOME/bin:$JAVA_HOME/bin
export JAVA_HOME
export PATH

Tuesday, September 13, 2016

Fix PAC Seg fault in Ubuntu 16.04


[1] https://sourceforge.net/p/pacmanager/bugs/271/
[2] https://sourceforge.net/p/pacmanager/discussion/1076055/thread/f6d6690e/


qyang@ubuntu:/opt/pac/lib/ex/vte32/auto/Gnome2/Vte$ cd /opt/pac/lib/ex/vte64/auto/Gnome2/Vte/
qyang@ubuntu:/opt/pac/lib/ex/vte64/auto/Gnome2/Vte$ ll
total 1.1M
-rw-r--r-- 1 root root 265K Nov  5  2015 Vte.so_64_5.022
-rw-r--r-- 1 root root  66K Nov  5  2015 Vte.so_64_5.020
-rw-r--r-- 1 root root  68K Nov  5  2015 Vte.so_64_5.018
-rw-r--r-- 1 root root 281K Nov  5  2015 Vte.so_64_5.016
-rw-r--r-- 1 root root 278K Nov  5  2015 Vte.so_64_5.014
-rw-r--r-- 1 root root  88K Nov  5  2015 Vte.so_64_5.000
drwxr-xr-x 3 root root 4.0K Jan  2  2016 ../
lrwxrwxrwx 1 root root   53 Jan  2  2016 Vte.so -> /opt/pac/lib/ex/vte64/auto/Gnome2/Vte/Vte.so_64_5.018
drwxr-xr-x 2 root root 4.0K Jan  2  2016 ./

qyang@ubuntu:/opt/pac/lib/ex/vte64/auto/Gnome2/Vte$ sudo rm Vte.so
qyang@ubuntu:/opt/pac/lib/ex/vte64/auto/Gnome2/Vte$ sudo ln -s /opt/pac/lib/ex/vte64/auto/Gnome2/Vte/Vte.so_64_5.022 Vte.so
qyang@ubuntu:/opt/pac/lib/ex/vte64/auto/Gnome2/Vte$ ll
total 1.1M
-rw-r--r-- 1 root root 265K Nov  5  2015 Vte.so_64_5.022
-rw-r--r-- 1 root root  66K Nov  5  2015 Vte.so_64_5.020
-rw-r--r-- 1 root root  68K Nov  5  2015 Vte.so_64_5.018
-rw-r--r-- 1 root root 281K Nov  5  2015 Vte.so_64_5.016
-rw-r--r-- 1 root root 278K Nov  5  2015 Vte.so_64_5.014
-rw-r--r-- 1 root root  88K Nov  5  2015 Vte.so_64_5.000
drwxr-xr-x 3 root root 4.0K Jan  2  2016 ../
lrwxrwxrwx 1 root root   53 Sep 14 13:30 Vte.so -> /opt/pac/lib/ex/vte64/auto/Gnome2/Vte/Vte.so_64_5.022
drwxr-xr-x 2 root root 4.0K Sep 14 13:30 ./

----
Uninstall and reinstall also fixed the issue after upgrade office Ubuntu from 14.04 to 16.04.
Pac start working in Unity rather than gnome.

$sudo apt remove pac
qyang@lgm-pc:~$ sudo dpkg -i ~/Downloads/pac-4.5.5.7-all.deb
Selecting previously unselected package pac.
(Reading database ... 333327 files and directories currently installed.)
Preparing to unpack .../Downloads/pac-4.5.5.7-all.deb ...
Unpacking pac (4.5.5.7) ...
Setting up pac (4.5.5.7) ...
Processing triggers for man-db (2.7.5-1) ...
Processing triggers for desktop-file-utils (0.22-1ubuntu5.1) ...
Processing triggers for mime-support (3.59ubuntu1) ...
Processing triggers for gnome-menus (3.13.3-6ubuntu3.1) ...
Processing triggers for bamfdaemon (0.5.3~bzr0+16.04.20160824-0ubuntu1) ...
Rebuilding /usr/share/applications/bamf-2.index...
qyang@lgm-pc:~$ pac
PAC started (pac) with PID 23818
INFO: Used config file '/home/qyang/.config/pac/pac.nfreeze'
INFO: Using 'Unity' tray icon

Friday, November 7, 2014

Expand Ubuntu Drive Size Running in VM Player

Ref
[1] http://superuser.com/questions/795699/how-to-extend-the-primary-partition-for-ubuntu-server-running-in-vmware-player
[2] http://www.in8sworld.net/blog/archives/3912
[3] http://blog.pluralsight.com/resize-vmware-linux-drives
[4] http://askubuntu.com/questions/429576/increase-ubuntu-partition-size-under-virtual-machine
[5] http://askubuntu.com/questions/294889/how-to-expand-the-ext4-primary-partition-size-in-a-vmware-player-virtual-disk
[6] http://xmodulo.com/how-to-change-the-boot-order-of-guest-vm-on-vmware-player.html  F2 into VM guest BIOS
[7] http://unix.stackexchange.com/questions/108199/centos-cant-use-new-extented-space-on-system-disc
[8] http://gparted-forum.surf4.info/viewtopic.php?id=16987

Adding following line into *.vmx file if too short to hit F2 key
--------------------
bios.bootDelay = "<number_of_milliseconds>"
bios.forceSetupOnce = "TRUE"

Command line option (run after boot VMWare from GParted disc or iso)
----------------------
--Start fdisk and display current partition---
# fdisk /dev/sda
Welcome to fdisk (util-linux 2.23.2).
Command (m for help): p
Device Boot         Start         End      Blocks   Id  System
/dev/sda1            2048    39845887    19921920   83  Linux
/dev/sda2       207607995   209712509     1052257+   5  Extended
/dev/sda5       207611904   209712509     1050303   82  Linux swap / Solaris

--Delete /dev/sda1-----
Command (m for help): d
Partition number (1,2,5, default 5): 1
Partition 1 is deleted

--Create new primary partition----
Command (m for help): n
Partition type:
   p   primary (0 primary, 1 extended, 3 free)
   l   logical (numbered from 5)
Select (default p): p
Partition number (1,3,4, default 1): 1
First sector (2048-209715199, default 2048):    <==== This MUST be the same as in the original partition table!
Using default value 2048
Last sector, +sectors or +size{K,M,G} (2048-207607994, default 207607994):  <== Use the default, will be maximum it can do
Using default value 207607994
Partition 1 of type Linux and of size 99 GiB is set

--Write new partition-----
Command (m for help): w
The partition table has been altered!
Calling ioctl() to re-read partition table.
Syncing disks.

--Check file system consistence----
# e2fsck -f /dev/sda1
e2fsck 1.42.9 (28-Dec-2013)
Pass 1: Checking inodes, blocks, and sizes
Pass 2: Checking directory structure
Pass 3: Checking directory connectivity
Pass 4: Checking reference counts
Pass 5: Checking group summary information
/dev/sda1: 11/1245184 files (0.0% non-contiguous), 122210/4980480 blocks

--Resize partition----
# resize2fs /dev/sda1
resize2fs 1.42.9 (28-Dec-2013)
Resizing the filesystem on /dev/sda1 to 25950743 (4k) blocks.


In my own practice, /dev/sda2 sectors straight after /dev/sda1/, so either change /dev/sda2/  and /dev/sda5/ start sectors, or just delete /dev/sda2 and /dev/sda5, then all unassigned sectors can be added to new /dev/sda1


Above is resizing 'primary partition'. Below is for resize partition on logical volume [7]
---------------------------------------------------
Baisc relationship among PhysicalVolume(PV), VolumeGroup(VG) and LogicalVolume(LV):
PV (/dev/sda2) -> VG (turnkey) -> LV (root)
Resize PV, then extend LV, then resize2fs /dev/VG/LV .....

---expand guest OS disk space from 20G to 200G
Using VMWare disk -> utilities -> Expand

---resize LVM in GParted GUI mode from 20G to 200G
Remember to partition->deactivate LVM2 PV before resizing. [8]

---run following commands after starting debian
root@trac ~# pvs
  PV         VG      Fmt  Attr PSize   PFree
  /dev/sda2  turnkey lvm2 a--  199.52g 182.02g
root@trac ~# lvs
  LV     VG      Attr     LSize   Pool Origin Data%  Move Log Copy%  Convert
  root   turnkey -wi-ao--  17.00g
  swap_1 turnkey -wi-ao-- 512.00m
root@trac ~# vgs
  VG      #PV #LV #SN Attr   VSize   VFree
  turnkey   1   2   0 wz--n- 199.52g 182.02g

---before adding newly allocated space into LVM
root@trac ~# df -h
Filesystem                Size  Used Avail Use% Mounted on
rootfs                     17G  893M   16G   6% /
udev                       10M     0   10M   0% /dev
tmpfs                     101M  172K  101M   1% /run
/dev/mapper/turnkey-root   17G  893M   16G   6% /
tmpfs                     5.0M     0  5.0M   0% /run/lock
tmpfs                     201M     0  201M   0% /run/shm
/dev/sda1                 415M   19M  375M   5% /boot

---Run following commands
root@trac ~# pvresize /dev/sda2
root@trac ~# lvextend /dev/mapper/turnkey-root /dev/sda2
root@trac ~# resize2fs /dev/turnkey/root

---Afterwards, checking again. It's done.
root@trac ~# df -h
Filesystem                Size  Used Avail Use% Mounted on
rootfs                    196G  909M  186G   1% /
udev                       10M     0   10M   0% /dev
tmpfs                     101M  172K  101M   1% /run
/dev/mapper/turnkey-root  196G  909M  186G   1% /
tmpfs                     5.0M     0  5.0M   0% /run/lock
tmpfs                     201M     0  201M   0% /run/shm
/dev/sda1                 415M   19M  375M   5% /boot


root@trac ~# pvs
  PV         VG      Fmt  Attr PSize   PFree
  /dev/sda2  turnkey lvm2 a--  199.52g 182.02g
root@trac ~# lvs
  LV     VG      Attr     LSize   Pool Origin Data%  Move Log Copy%  Convert
  root   turnkey -wi-ao--  17.00g
  swap_1 turnkey -wi-ao-- 512.00m
root@trac ~# vgs
  VG      #PV #LV #SN Attr   VSize   VFree
  turnkey   1   2   0 wz--n- 199.52g 182.02g
root@trac ~# df -h
Filesystem                Size  Used Avail Use% Mounted on
rootfs                     17G  893M   16G   6% /
udev                       10M     0   10M   0% /dev
tmpfs                     101M  172K  101M   1% /run
/dev/mapper/turnkey-root   17G  893M   16G   6% /
tmpfs                     5.0M     0  5.0M   0% /run/lock
tmpfs                     201M     0  201M   0% /run/shm
/dev/sda1                 415M   19M  375M   5% /boot
root@trac ~# pvresize /dev/sda2
  Physical volume "/dev/sda2" changed
  1 physical volume(s) resized / 0 physical volume(s) not resized
root@trac ~# lvs
  LV     VG      Attr     LSize   Pool Origin Data%  Move Log Copy%  Convert
  root   turnkey -wi-ao--  17.00g
  swap_1 turnkey -wi-ao-- 512.00m
root@trac ~# lvextend /dev/mapper/turnkey-root /dev/sda2
  Extending logical volume root to 199.02 GiB
  Logical volume root successfully resized
root@trac ~# lvs
  LV     VG      Attr     LSize   Pool Origin Data%  Move Log Copy%  Convert
  root   turnkey -wi-ao-- 199.02g
  swap_1 turnkey -wi-ao-- 512.00m
root@trac ~# resize2fs /dev/turnkey/root
resize2fs 1.42.5 (29-Jul-2012)
Filesystem at /dev/turnkey/root is mounted on /; on-line resizing required
old_desc_blocks = 2, new_desc_blocks = 13
Performing an on-line resize of /dev/turnkey/root to 52171776 (4k) blocks.
The filesystem on /dev/turnkey/root is now 52171776 blocks long.

root@trac ~# df -h
Filesystem                Size  Used Avail Use% Mounted on
rootfs                    196G  909M  186G   1% /
udev                       10M     0   10M   0% /dev
tmpfs                     101M  172K  101M   1% /run
/dev/mapper/turnkey-root  196G  909M  186G   1% /
tmpfs                     5.0M     0  5.0M   0% /run/lock
tmpfs                     201M     0  201M   0% /run/shm
/dev/sda1                 415M   19M  375M   5% /boot

#man lvextend
.....
Examples
       "lvextend -L +54 /dev/vg01/lvol10 /dev/sdk3" tries to extend the size of that logical volume by 54MB on physical volume /dev/sdk3.  This is only possible if
       /dev/sdk3 is a member of volume group vg01 and there are enough free physical extents in it.

       "lvextend /dev/vg01/lvol01 /dev/sdk3" tries to extend the size of that logical volume by the amount of free space on physical  volume  /dev/sdk3.   This  is
       equivalent to specifying "-l +100%PVS" on the command line.

       "lvextend -L+16M vg01/lvol01 /dev/sda:8-9 /dev/sdb:8-9"
       tries to extend a logical volume "vg01/lvol01" by 16MB using physical extents /dev/sda:8-9 and /dev/sdb:8-9 for allocation of extents.


Surprisingly fast when do it for fedora20 (Only a couple of seconds)
---------------------------------------------------------------------
1. Expand in VMWare on fedora20 disk space from 20G to 250G
2. GParted iso start up and resize LVM2 PV from 20G to 250G to include new unallocated new space from VMware expansion.
3. Restarted into Fedora20. run lvextend, and resize2fs. A few seconds for this on-line resizing. Done

[root@fedora20 q.yang]# lvextend /dev/mapper/fedora_192-root /dev/sda2
Extending logical volume root to 247.51 GiB Logical volume root successfully resized [root@fedora20 q.yang]# resize2fs /dev/fedora_192/root resize2fs 1.42.12 (29-Aug-2014) Filesystem at /dev/fedora_192/root is mounted on /; on-line resizing required old_desc_blocks = 2, new_desc_blocks = 16 The filesystem on /dev/fedora_192/root is now 64882688 (4k) blocks long. [root@fedora20 q.yang]# df -h Filesystem Size Used Avail Use% Mounted on devtmpfs 988M 0 988M 0% /dev tmpfs 997M 152K 997M 1% /dev/shm tmpfs 997M 884K 996M 1% /run tmpfs 997M 0 997M 0% /sys/fs/cgroup /dev/mapper/fedora_192-root 244G 16G 219G 7% / tmpfs 997M 32K 997M 1% /tmp /dev/sda1 477M 146M 302M 33% /boot /dev/sr0 229M 229M 0 100% /run/media/q.yang/GParted-live
   

Thursday, June 5, 2014

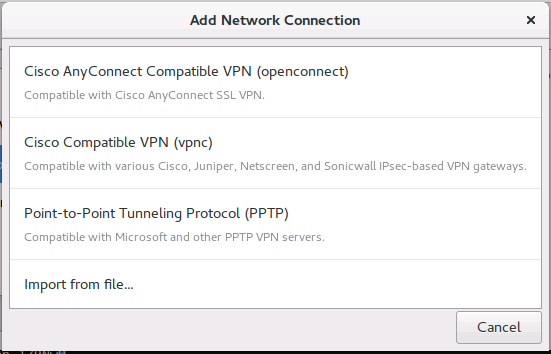
Connecting to VPN under Ubuntu 10.10 (pptp approach tested working in Fedora20 as well)

[1] http://ubuforums.org/showthread.php?t=1307345unt
[2] http://www.cyberciti.biz/tips/howto-configure-ubuntu-fedora-linux-pptp-client.html
[3] https://www.centos.org/forums/viewtopic.php?f=16&t=52407
[4] https://forums.opensuse.org/showthread.php/507157-NetworkManager-pptp-doesn-t-work-after-lastest-update

3 common vpn clients in Linux (pptp, vpnc, openconnect)


I have seen problems reported that were related to using 3.18.x kernels, and 'nf_conntrack_pptp' module not being loaded. 


modprobe nf_conntrack_pptp

Solved the issue. 

you could automate the loading of this module at boot by adding a .conf file in /etc/modules-load.d/ directory eg /etc/modules-load.d/pptp.conf using your favourite editor as root. As an example
Code:
sudo nano  /etc/modules-load.d/pptp.conf
Code:
# Load nf_conntrack_pptp module at boot
nf_conntrack_pptp
More information about loading modules at boot here:

http://www.freedesktop.org/software/...es-load.d.html    [4]


Here's a synopsis of my VPN setups. I have proven this to work on both x86 and x64 for all 3 VPN types.

Important note/disclaimer: I tested these configurations on VMware Workstation 7 VM's and a Dell Vostro 220. All installations were fresh installs, not upgrades. Also, please notice that I detail what type of firewall/VPN I am connecting to for each VPN type. There are so many variations on these VPN implementations that it is extremely difficult to generalize a known-good configuration for each.

1. Install various VPN components
a. PPTP  (worked on fedora 20 connecting to GSN vpn)
  • pptp-linux
  • network-manager-pptp
  • network-manager-pptp-gnome    (add vpn button stop being gray out after installing this) 
b. VPNC
  • vpnc
  • network-manager-vpnc
c. OpenConnect
  • openconnect
  • network-manager-openconnect

2. Reboot

3. PPTP VPN Configuration - This setup works for connecting to ISA 2004/2006 PPTP VPNs. It should work for connecting to MS PPTP VPN implementations in general. I can't speak for other PPTP VPN implementations.

a. Create new PPTP connection
  • VPN Tab Settings
  • Set Connection name
  • Set Gateway
  • Set username (for domain-based user accounts, use domain\username)
  • DO NOT SET PASSWORD
  • DO NOT SET NT DOMAIN
  • PPTP Advanced Options (Advanced button)
  • uncheck all auth methods EXCEPT MSCHAPv2
  • check "Use Point-to-Point encryption (MPPE)"
    • leave Security set at "All Available (Default)"
    • trying to force encryption level causes this option to become unset
  • check "Allow stateful inspection"
  • uncheck "Allow BSD Data Compression"
  • uncheck "Allow Deflate Data Compression"
  • uncheck "Use TCP Header Compression"
  • uncheck "Send PPP Echo Packets" (although connection works either checked or unchecked)
  • save configuration

b. Initial Connection attempt
  • enter password in login box
  • DO NOT check either password save box at this time
  • once connection establishes, verify remote connectivity - ping, rdp, ssh, etc.
  • disconnect VPN session

c. 2nd connection attempt
  • enter password in login box
  • check both password save option boxes
  • once again verify remote connectivity
  • disconnect VPN session

d. Subsequent connection attempts
  • VPN session should automatically connect using saved auth credentials
4. VPNC VPN Configuration - This setup works connecting to an ASA5510 - software version 8.2(1). I didn't have any other Cisco devices to test against.

a. Create new VPNC connection
  • set connection name
  • set Gateway
  • set Group Name
  • set User Password to "Saved" and enter password
  • set Group Password to "Saved" and enter password
  • set username
  • set domain (if applicable)
  • leave Encryption Method at "Secure (Default)"
  • set NAT traversal to "NAT-T"
  • save configuration

b. Initial Connection attempt
  • open VPNC connection
  • if prompted, select "Always Allow" if you want connection to be automatic
  • verify remote connectivity - ping, rdp, ssh, etc.
  • disconnect VPN session
c. Subsequent connection attempts
  • open VPNC connection - session should automatically connect

5. OpenConnect VPN Configuration - This setup works connecting to an ASA5510 - software version 8.2(1). I didn't have any other Cisco devices to test against.

a. Create new OpenConnect connection
  • set connection name
  • set Gateway
  • set Authentication type to "Password/SecurID"
  • no need to set username, OpenConnect won't store it yet
  • save configuration

b. Initial connection attempt
  • open VPN connection
  • check "Automatically start connecting next time"
  • click Close
  • you will get the "No Valid VPN Secrets" VPN failure message

c. 2nd connection attempt
  • open VPN connection
  • accept certificate (if prompted)
  • change Group (if necessary)
  • enter username (may need to be domain\username)
  • enter password
  • click Login
  • if VPN connection fails, see note below
  • verify remote connectivity - ping, rdp, ssh, etc.
  • disconnect session

d. Subsequent connection attempts
  • open VPN connection
  • enter password
  • session should connect

Note: If you get the "Login Failed" message, cancel and wait 15-30 minutes before attempting to connect again. Also, I ended up having to use the NT style domain\username pair for authentication, even though a Cisco AnyConnect client connecting to the same ASA only requires username.

More Detail: OpenConnect has been brutal to get connected. I got failed attempt after failed attempt. When I checked the NPS (IAS) log and the Security Event log on the W2K8 domain controller, I could see my user account authenticating properly via RADIUS from the ASA. Yet the OpenConnect client came back with a "Login Failed" message. I'm not an ASA expert, so I have no idea what to check in the ASA configuration to troubleshoot this problem, other than the basic AAA configuration. But I believe the problem lies in the ASA configuration because when I get the OpenConnect "Login Failed" message, the AnyConnect client from my Windows laptop fails as well. I think it may be a ridiculously short timeout or max failure setting. Whatever the issue is, I have to wait for some length of time (~15-30 minutes) for whatever the problem is to reset.

However, once I finally get the OpenConnect client to successfully connect, it worked from then on. (Just don't mess with the connection configuration, or you will get to go thru this whole process again.)

-----------------------------

P.S. Please leave me feedback for what worked and didn't work for you. Also, if you can, please post a short description documenting what firewall/VPN device you were connecting to and any modifications you may have made to the VPN connection configuration. Maybe we can make this a thread for known-good configurations.

Thanks.
Last edited by sweisler; November 7th, 2009 at 04:20 AM.

Sunday, August 7, 2011

Install VLC Player for ubuntu 10.10

[1] Web source Link

Command line way

You need to check that a universe mirror is listed in your /etc/apt/sources.list file.

% sudo apt-get update
% sudo apt-get install vlc vlc-plugin-pulse mozilla-plugin-vlc

Tuesday, July 19, 2011

SAMBA Setting -- Ubuntu 10.10

[1] https://help.ubuntu.com/community/Samba/SambaServerGuide
[2] https://help.ubuntu.com/community/Samba


INSTALL SAMBA IF NOT INSTALLED (Live Ubuntu CD doesn't install in default)
---------------------------------------------------------------------------
In order to apply patch file, set up Samba server for file exchange between Windows
and Ubuntu box.

quentin@ubuntu:~/lpc3250/ltib-qs$ sudo apt-get install samba-common-bin (has to be done to get samba work)
quentin@ubuntu:~/lpc3250/ltib-qs$ sudo apt-get install system-config-samba


ADD SAMBA PASSWORD PROTECTION FOR ONE USER IN CMD LINE
----------------------------------------------------------
sudo smbpasswd -a username

RESTART SAMBA SERVER IN UBUNTU
------------------------------
sudo restart smbd


MANUALLY ADD SHARE BY EDITING SMB.CONF
(if no luck to set it by using system-config-samba GUI)
--------------------------------------------------------------
(system-config-samba might issue warning on smb.conf syntax error but it won't affect the sharing of folders) See [2], another way to run Samba as service


quentin@QuentinUbuntu:/media/WQYSada$ ll /etc/samba/
total 32
drwxr-xr-x 2 root root 4096 2011-07-21 20:53 ./
drwxr-xr-x 137 root root 12288 2011-10-15 12:47 ../
-rw-r--r-- 1 root root 8 2010-10-06 09:26 gdbcommands
-rw-r--r-- 1 root root 11553 2011-07-21 20:53 smb.conf
-rw-r--r-- 1 root root 0 2011-07-21 20:43 smbusers


quentin@ubuntu:~$ diff smb.conf smb-vm.conf
110c110
< passdb backend = tdbsam
---
> ; passdb backend = tdbsam
191c191

> username map = /etc/samba/smbusers
298c299

[printers]

< guest ok = no
---
> ; guest ok = no

---ADD THIS SECTION AT THE END OF SMB.CONF---

[UbuntuQt]
comment = Quentin's DwLd folder on Ubuntu
path = /home/quentin
writeable = yes
; browseable = yes
valid users = quentin

Tuesday, June 28, 2011

Check package version under Ubuntu

[1] http://www.howtogeek.com/howto/ubuntu/see-what-version-of-a-package-is-installed-on-ubuntu/


quentin@ubuntu:/var/lib/tftpboot$ dpkg -s mtd-utils
Package: mtd-utils
Status: install ok installed
Priority: extra
Section: utils
Installed-Size: 1160
Maintainer: Ubuntu Developers
Architecture: i386
Version: 20100706-1
Replaces: mtd-tools
Provides: mtd-tools
Depends: libc6 (>= 2.8), liblzo2-2, libuuid1 (>= 2.16), zlib1g (>= 1:1.1.4)
Description: Memory Technology Device Utilities
Utilities for manipulating memory technology devices, such as flash
memory, Disk-On-Chip, or ROM. Includes mkfs.jffs2, a tool to create
JFFS2 (journaling flash file system) filesystems.
Original-Maintainer: Riku Voipio
Homepage: http://www.linux-mtd.infradead.org/

Monday, June 20, 2011

VNC Server set up in UBUNTU

[1] http://theseekersquill.wordpress.com/2010/03/16/vnc-server-ubuntu-windows/ ---Best Link
[2] http://nuclear-imaging.info/site_content/2010/04/19/vnc-server-setup-for-ubuntu-10-04-lucid-lynx/
[3] http://usingnix.wordpress.com/2010/12/15/setup-vnc-in-ubuntu-10-10/
[4] http://blog.sudobits.com/2011/03/13/vnc-server-for-ubuntu-10-10/
[5] http://ubuntuforums.org/showthread.php?t=1313898 ---- Get rid of warning for auto start
[6] http://www.debianhelp.co.uk/vnc.htm
[7] http://askubuntu.com/questions/390113/x11vnc-much-slower-than-xvnc-how-to-get-a-xubuntu-session-manually
[8] https://freevps.us/thread-14110.html
[9] https://help.ubuntu.com/community/VNC/Servers
[10] https://wiki.archlinux.org/index.php/TigerVNC  
[11] http://askubuntu.com/questions/603169/lubuntu-14-04-tightvnc-remote-mouse-cursor-is-x

[12] vnc/xrdp to xfce4  windows manager good posts
[13] Using ubuntu 14.04.3 default vino desktop sharing (current session)
[14] One bug fix in early 14.04 vino

qyang@lubuntu-laptop:~$ apt-cache search autocutsel
autocutsel - Keep the X clipboard and the cutbuffer in sync

Got tightvnc work on lubuntu after changing xstartup file
./vnc/xstartup file is configured as follows [11] :


#!/bin/sh

xrdb $HOME/.Xresources
xsetroot -solid grey -cursor_name left_ptr
autocutsel -fork
lxsession -s Lubuntu -e LXDE
 

x11vnc is slower. [7] [8] tightvncserver is suggested and faster. [8] vnc4server was discussed a lot.

x11vnc is different from xvnc(tightvnc, tigervnc). The latter support multiple sessions. Also, seems x11vnc is slower than xvnc.[7]
x11vnc offers better security focus ( can be secured with SSH or SSL.) but it's known to be slower. [8]


vino and x11vnc in Ubuntu [9]


VNC SET UP AND SSH SERVER SET UP
-----------------------------------

INSTALL OPENSSH SERVER AND VNC SERVER
----------------------------------------
quentin@QuentinUbuntu:~$ sudo apt-get install openssh-server openssh-client vnc4server xinetd vncviewer
[sudo] password for quentin:
Sorry, try again.
[sudo] password for quentin:
Reading package lists... Done
Building dependency tree
Reading state information... Done
Note, selecting 'xtightvncviewer' instead of 'vncviewer'
The following extra packages will be installed:
xbase-clients xtightvncviewer
Suggested packages:
libpam-ssh keychain openssh-blacklist openssh-blacklist-extra rssh
molly-guard vnc-java tightvncserver
The following NEW packages will be installed:
openssh-server vnc4server xbase-clients xinetd xtightvncviewer
The following packages will be upgraded:
openssh-client
1 upgraded, 5 newly installed, 0 to remove and 328 not upgraded.
Need to get 3,305kB of archives.
After this operation, 6,484kB of additional disk space will be used.
Do you want to continue [Y/n]? Y
....................
.............


SSH SERVER SET UP
--------------------------------------------
quentin@QuentinUbuntu:~$ ssh-keygen
Generating public/private rsa key pair.
Enter file in which to save the key (/home/quentin/.ssh/id_rsa):
Created directory '/home/quentin/.ssh'.
Enter passphrase (empty for no passphrase):
Enter same passphrase again:
Your identification has been saved in /home/quentin/.ssh/id_rsa.
Your public key has been saved in /home/quentin/.ssh/id_rsa.pub.
The key fingerprint is:
9f:71:93:c0:80:9f:aa:e5:a9:ec:e1:0c:d2:9a:a3:13 quentin@QuentinUbuntu
The key's randomart image is:
+--[ RSA 2048]----+
| .. |
| . o |
| . .o |
| o . . |
| .S . + |
|E. o . + . |
|..o .+ . o |
|o+ =..o |
|=o .*. |
+-----------------+

SET UP VNC SERVER PASSWORD
--------------------------------------
qyang@lubuntu-laptop:~$ vncpasswd
Using password file /home/qyang/.vnc/passwd
VNC directory /home/qyang/.vnc does not exist, creating.
Password:
Verify: 
Would you like to enter a view-only password (y/n)? y
Password:
Verify: 


START VNC SERVER
-----------------------------
quentin@QuentinUbuntu:~$ vnc4server

New 'QuentinUbuntu:1 (quentin)' desktop is QuentinUbuntu:1

Creating default startup script /home/quentin/.vnc/xstartup
Starting applications specified in /home/quentin/.vnc/xstartup
Log file is /home/quentin/.vnc/QuentinUbuntu:1.log


quentin@QuentinUbuntu:~$ ps aux |grep vnc
quentin 1898 0.1 0.3 10504 5284 pts/0 S 19:07 0:00 Xvnc4 :1 -desktop QuentinUbuntu:1 (quentin) -auth /var/run/gdm/auth-for-quentin-5eao3N/database -geometry 1024x768 -depth 16 -rfbwait 30000 -rfbauth /home/quentin/.vnc/passwd -rfbport 5901 -pn -fp /usr/X11R6/lib/X11/fonts/Type1/,/usr/X11R6/lib/X11/fonts/Speedo/,/usr/X11R6/lib/X11/fonts/misc/,/usr/X11R6/lib/X11/fonts/75dpi/,/usr/X11R6/lib/X11/fonts/100dpi/,/usr/share/fonts/X11/misc/,/usr/share/fonts/X11/Type1/,/usr/share/fonts/X11/75dpi/,/usr/share/fonts/X11/100dpi/ -co /etc/X11/rgb
quentin 1904 0.0 0.0 4596 1540 pts/0 S 19:07 0:00 vncconfig -iconic
quentin 1936 0.0 0.0 4008 748 pts/0 S+ 19:09 0:00 grep --color=auto vnc

KILL VNCSERVER
------------------------
quentin@QuentinUbuntu:~$ vncserver -kill :1
Killing Xvnc4 process ID 3561

LOCAL VNC ACCESS
-----------------------
quentin@QuentinUbuntu:~$vncviewer localhost:1

SSH SERVER LOG IN VIA PUTTY
-------------------------------
quentin@10.1.1.5's password:
Linux QuentinUbuntu 2.6.35-22-generic #33-Ubuntu SMP Sun Sep 19 20:34:50 UTC 2010 i686 GNU/Linux
Ubuntu 10.10

Welcome to Ubuntu!
* Documentation: https://help.ubuntu.com/

Your CPU appears to be lacking expected security protections.
Please check your BIOS settings, or for more information, run:
/usr/bin/check-bios-nx --verbose

336 packages can be updated.
157 updates are security updates.

New release 'natty' available.
Run 'do-release-upgrade' to upgrade to it.


The programs included with the Ubuntu system are free software;
the exact distribution terms for each program are described in the
individual files in /usr/share/doc/*/copyright.

Ubuntu comes with ABSOLUTELY NO WARRANTY, to the extent permitted by
applicable law.


EDIT VNC XSTARTUP FILE TO REMOVE GREY BACKGROUND
------------------------------------------------
quentin@QuentinUbuntu:~$ vi /home/quentin/.vnc/xstartup

#!/bin/sh

# Uncomment the following two lines for normal desktop:
unset SESSION_MANAGER
#exec /etc/X11/xinit/xinitrc
sh /etc/X11/xinit/xinitrc

#[ -x /etc/vnc/xstartup ] && exec /etc/vnc/xstartup
#[ -r $HOME/.Xresources ] && xrdb $HOME/.Xresources
#xsetroot -solid grey
#vncconfig -iconic &
#x-terminal-emulator -geometry 80x24+10+10 -ls -title "$VNCDESKTOP Desktop" &

#x-window-manager &

#gnome-session &
#twm &

START VNC SERVER AGAIN
----------------------------------
quentin@QuentinUbuntu:~$ vncserver
xauth: creating new authority file /home/quentin/.Xauthority

New 'QuentinUbuntu:1 (quentin)' desktop is QuentinUbuntu:1

Starting applications specified in /home/quentin/.vnc/xstartup
Log file is /home/quentin/.vnc/QuentinUbuntu:1.log


MAKE VNC SERVER AUTO RUN WHEN BOOT
------------------------------------
$sudo -i

root@QuentinUbuntu:~# vi /etc/init.d/vncserver

#!/bin/sh -e

### BEGIN INIT INFO
# Provides: vncserver
# Required-Start: networking
# Default-Start: S
# Default-Stop: 0 6
### END INIT INFO

PATH="$PATH:/usr/X11R6/bin/"

# The Username:Group that will run VNC
export USER="quentin"
#${RUNAS}

# The display that VNC will use
DISPLAY="1"
# Color depth (between 8 and 32)
DEPTH="16"
# The Desktop geometry to use.
#GEOMETRY="x"
#GEOMETRY="800x600"
GEOMETRY="1024x768"
#GEOMETRY="1280x1024"
# The name that the VNC Desktop will have.
NAME="QuentinUbuntu-vnc-server"
OPTIONS="-name ${NAME} -depth ${DEPTH} -geometry ${GEOMETRY} :${DISPLAY}"
. /lib/lsb/init-functions

case "$1" in
start)
su ${USER} -c "/usr/bin/vncserver ${OPTIONS}"
;;
stop)
su ${USER} -c "/usr/bin/vncserver -kill :${DISPLAY}"
;;
restart)
$0 stop
$0 start
;;
esac
exit 0

root@QuentinUbuntu:~# chmod +x /etc/init.d/vncserver

MAKE IT AUTO RUN WHEN BOOT
-----------------------------------
sudo update-rc.d vncserver defaults
update-rc.d: warning: /etc/init.d/vncserver missing LSB keyword 'required-stop'

update-rc.d: warning: vncserver start runlevel arguments (2 3 4 5) do not match LSB Default-Start values (S)
update-rc.d: warning: vncserver stop runlevel arguments (0 1 6) do not match LSB Default-Stop values (0 6)
Adding system startup for /etc/init.d/vncserver ...
/etc/rc0.d/K20vncserver -> ../init.d/vncserver
/etc/rc1.d/K20vncserver -> ../init.d/vncserver
/etc/rc6.d/K20vncserver -> ../init.d/vncserver
/etc/rc2.d/S20vncserver -> ../init.d/vncserver
/etc/rc3.d/S20vncserver -> ../init.d/vncserver
/etc/rc4.d/S20vncserver -> ../init.d/vncserver
/etc/rc5.d/S20vncserver -> ../init.d/vncserver
To get rid of warning

we change the /etc/init.d/vncserver

### BEGIN INIT INFO
# Provides: vncserver
# Required-Start: $remote_fs $syslog
# Required-Stop: $remote_fs $syslog
# Default-Start: 2 3 4 5
# Default-Stop: 0 1 6
# Short-Description: Start daemon at boot time
# Description: Enable service provided by daemon.
### END INIT INFO

quentin@QuentinUbuntu:~$ sudo update-rc.d -f vncserver remove
Removing any system startup links for /etc/init.d/vncserver ...
/etc/rc0.d/K20vncserver
/etc/rc1.d/K20vncserver
/etc/rc2.d/S20vncserver
/etc/rc3.d/S20vncserver
/etc/rc4.d/S20vncserver
/etc/rc5.d/S20vncserver
/etc/rc6.d/K20vncserver

NO MORE WARNINGS
--------------------------------
quentin@QuentinUbuntu:~$ sudo update-rc.d vncserver defaults
Adding system startup for /etc/init.d/vncserver ...
/etc/rc0.d/K20vncserver -> ../init.d/vncserver
/etc/rc1.d/K20vncserver -> ../init.d/vncserver
/etc/rc6.d/K20vncserver -> ../init.d/vncserver
/etc/rc2.d/S20vncserver -> ../init.d/vncserver
/etc/rc3.d/S20vncserver -> ../init.d/vncserver
/etc/rc4.d/S20vncserver -> ../init.d/vncserver
/etc/rc5.d/S20vncserver -> ../init.d/vncserver

Wednesday, May 25, 2011

Ubuntu --- install tftp Server

[1] http://pjpramod.blogspot.com/2009/08/setting-up-tftp-server-on-ubuntu-904.html
[2] http://www.ubuntugeek.com/howto-setup-advanced-tftp-server-in-ubuntu.html


-----------------------[1]---------------------------------------
quentin@ubuntu:~/lpc3250/ltib-qs$ sudo apt-get install tftpd-hpa

Tuesday, May 24, 2011

Ubuntu --- install LTIB

[1] http://imxcommunity.org/group/ubuntutipsandtricks/forum/topics/building-ltib-in-ubuntu-1004
[2] http://www.imxdev.org/wiki/index.php?title=ALL_Boards_ltib_config_ubuntu


quentin@ubuntu:~/lpc3250$ wget http://www.bitshrine.org/netinstall

--2011-05-23 21:47:51-- http://www.bitshrine.org/netinstall
Resolving www.bitshrine.org... 66.96.145.106
Connecting to www.bitshrine.org|66.96.145.106|:80... connected.
HTTP request sent, awaiting response... 200 OK
Length: 2327 (2.3K) [text/html]
Saving to: `netinstall'

100%[======================================>] 2,327 --.-K/s in 0s

2011-05-23 21:47:53 (6.94 MB/s) - `netinstall' saved [2327/2327]

quentin@ubuntu:~/lpc3250$ ll
total 12
drwxr-xr-x 2 quentin quentin 4096 2011-05-23 21:47 ./
drwxr-xr-x 24 quentin quentin 4096 2011-05-23 21:42 ../
-rw-r--r-- 1 quentin quentin 2327 2008-10-23 01:43 netinstall
quentin@ubuntu:~/lpc3250$ perl netinstall

You are about to install the LTIB (GNU/Linux Target Image Builder)

Do you want to continue ? Y|n
y
Where do you want to install LTIB ? (/home/quentin/lpc3250/ltib)
/home/quentin/lpc3250/ltib-qs
Installing LTIB to /home/quentin/lpc3250/ltib-qs
+ cvs -z3 -d:pserver:anonymous@cvs.savannah.nongnu.org:/sources/ltib co -d ltib-qs -P ltib
sh: cvs: not found
Died at netinstall line 69, line 2.
quentin@ubuntu:~/lpc3250$ cvs
The program 'cvs' can be found in the following packages:
* cvs
* cvsnt
Try: sudo apt-get install
quentin@ubuntu:~/lpc3250$ sudo apt-get install cvs
Reading package lists... Done
Building dependency tree
Reading state information... Done
The following NEW packages will be installed:
cvs
0 upgraded, 1 newly installed, 0 to remove and 326 not upgraded.
Need to get 1,685kB of archives.
After this operation, 3,703kB of additional disk space will be used.
Get:1 http://us.archive.ubuntu.com/ubuntu/ maverick/main cvs i386 1:1.12.13-12ubuntu1 [1,685kB]
Fetched 1,685kB in 10s (161kB/s)
Preconfiguring packages ...
Selecting previously deselected package cvs.
(Reading database ... 118286 files and directories currently installed.)
Unpacking cvs (from .../cvs_1%3a1.12.13-12ubuntu1_i386.deb) ...
Processing triggers for man-db ...
Processing triggers for install-info ...
Processing triggers for doc-base ...
Processing 31 changed 2 added doc-base file(s)...
Registering documents with scrollkeeper...
Setting up cvs (1:1.12.13-12ubuntu1) ...
Ignoring install-info called from maintainer script
The package cvs should be rebuilt with new debhelper to get trigger support
Ignoring install-info called from maintainer script
The package cvs should be rebuilt with new debhelper to get trigger support
quentin@ubuntu:~/lpc3250$ ll
total 12
drwxr-xr-x 2 quentin quentin 4096 2011-05-23 21:47 ./
drwxr-xr-x 24 quentin quentin 4096 2011-05-23 21:42 ../
-rw-r--r-- 1 quentin quentin 2327 2008-10-23 01:43 netinstall
quentin@ubuntu:~/lpc3250$ perl netinstall

You are about to install the LTIB (GNU/Linux Target Image Builder)

Do you want to continue ? Y|n
y
Where do you want to install LTIB ? (/home/quentin/lpc3250/ltib)
/home/quentin/lpc3250/ltib-qs/


===============================Ref [1] below ================================
quentin@ubuntu:~/lpc3250/ltib-qs$ sudo rm /bin/sh
[sudo] password for quentin:
quentin@ubuntu:~/lpc3250/ltib-qs$ sudo ln -s /bin/bash /bin/sh
quentin@ubuntu:~/lpc3250/ltib-qs$ sudo chmod 777 /opt
quentin@ubuntu:~/lpc3250/ltib-qs$ sudo apt-get install gcc build-essential

quentin@ubuntu:~/lpc3250/ltib-qs$ sudo apt-get install zlib1g-dev
quentin@ubuntu:~/lpc3250/ltib-qs$ sudo apt-get install libncurses-dev
quentin@ubuntu:~/lpc3250/ltib-qs$ sudo apt-get install m4
quentin@ubuntu:~/lpc3250/ltib-qs$ sudo apt-get install bison
quentin@ubuntu:~/lpc3250/ltib-qs$ sudo apt-get install rpm
quentin@ubuntu:~/lpc3250/ltib-qs$ sudo apt-get install ccache
quentin@ubuntu:~/lpc3250/ltib-qs$ sudo apt-get install flex

------------------------------------------------
In order to apply patch file, set up Samba server for file exchange between Windows
and Ubuntu box.

quentin@ubuntu:~/lpc3250/ltib-qs$ sudo apt-get install samba-common-bin (has to be done to get samba work)
quentin@ubuntu:~/lpc3250/ltib-qs$ sudo apt-get install system-config-samba

-------------------------------
quentin@ubuntu:~/lpc3250/ltib-qs$ cp -p /home/quentin/Downloads/2869_ltib.patch ./
quentin@ubuntu:~/lpc3250/ltib-qs$ patch -i 2869_ltib.patch
patching file ltib
Hunk #1 succeeded at 964 (offset 38 lines).

quentin@ubuntu:~/lpc3250/ltib-qs$ sudo /usr/sbin/visudo

# User privilege specification
root ALL=(ALL) ALL
quentin ALL = NOPASSWD: /usr/bin/rpm, /opt/ltib/usr/bin/rpm, /opt/freescale/lti$

---------------------------------------------------------
uentin@ubuntu:~/lpc3250/ltib-qs$ ./ltib -m config

Installing host support packages.

This only needs to be done once per host, but may take up to
an hour to complete ...

If an error occurs, a log file with the full output may be found in:
/home/quentin/lpc3250/ltib-qs/host_config.log

If you would like to see the log messages as the host packages are built and
installed:

* Open another terminal in the same directory
* Run the command: tail -f host_config.log
* When you're done with the tail, use CTRL+C to exit

------------------------------------------------
$ sudo rm -rf ~/.ccache

Thursday, November 11, 2010

TFTP and NFS server set up

[1] http://rpm.pbone.net/index.php3/stat/4/idpl/13694850/dir/fedora_9/com/tftp-server-0.48-6.fc9.i386.rpm.html
[2] https://help.ubuntu.com/community/SettingUpNFSHowTo ---- NFS setting under UBUNTU
[3] https://help.ubuntu.com/8.04/serverguide/C/network-file-system.html --- NFS Setting
[4] Fail to put file to TFTP server answer

Ip address range should be listed in format below:

192.168.1.0/28                  192.168.1.0   - 192.168.1.15
192.168.1.16/28                 192.168.1.16  - 192.168.1.31
192.168.1.32/27                 192.168.1.32  - 192.168.1.63
192.168.1.64/26                 192.168.1.64  - 192.168.1.127
192.168.1.128/25                192.168.1.128 - 192.168.1.255


###########################
#TFTP Server Set UP.
###########################

CHECK WHETHER TFTP PACKAGE IS INSTALLED
-------------------------------------------
[q.yang@localhost ~]$ rpm -q tftp-server
tftp-server-0.48-6.fc9.i386

INSTALL TFTP FROM RPM
------------------------------
Download it from [1]
Download Tftp dependancy xinetd-2.3.14-20.fc9.i386 from [1]

[root@localhost q.yang]# rpm -ivh Download/xinetd-2.3.14-20.fc9.i386.rpm
warning: Download/xinetd-2.3.14-20.fc9.i386.rpm: Header V3 DSA signature: NOKEY, key ID 6df2196f
Preparing... ########################################### [100%]
1:xinetd ########################################### [100%]
[root@localhost q.yang]# rpm -ivh Download/tftp-server-0.48-6.fc9.i386.rpm
warning: Download/tftp-server-0.48-6.fc9.i386.rpm: Header V3 DSA signature: NOKEY, key ID 6df2196f
Preparing... ########################################### [100%]
1:tftp-server ########################################### [100%]

[root@localhost q.yang]# rpm -q tftp-server
tftp-server-0.48-6.fc9.i386
[root@localhost q.yang]# chkconfig tftp on


[root@localhost ~]# vi /etc/sysconfig/iptables
# Firewall configuration written by system-config-firewall
# Manual customization of this file is not recommended.
*filter
:INPUT ACCEPT [0:0]
:FORWARD ACCEPT [0:0]
:OUTPUT ACCEPT [0:0]
-A INPUT -m state --state ESTABLISHED,RELATED -j ACCEPT
-A INPUT -p icmp -j ACCEPT
-A INPUT -i lo -j ACCEPT
-A INPUT -m state --state NEW -m tcp -p tcp --dport 22 -j ACCEPT
-A INPUT -j REJECT --reject-with icmp-host-prohibited
-A INPUT -m state --state NEW -m udp -p udp --dport 69 -j ACCEPT
-A FORWARD -j REJECT --reject-with icmp-host-prohibited
COMMIT
[root@localhost ~]# service iptables restart

Alternatively using GUI to manage firmwall:


[root@localhost ~]# chkconfig tftp on
[root@localhost ltib-qs]# service xinetd restart
#show whether tftp is running.
[root@localhost ltib-qs]# netstat -a | grep udp
[root@localhost ~]# chown q.yang /var/lib/tftpboot
[root@localhost ~]# chgrp users /var/lib/tftpboot
alternatively:
[root@localhost q.yang]# chown q.yang:developer /var/lib/tftpboot/
[root@localhost q.yang]# chmod g+w /var/lib/tftpboot/
drwxrwxr-x 2 q.yang developer 4096 2008-05-22 07:55 tftpboot


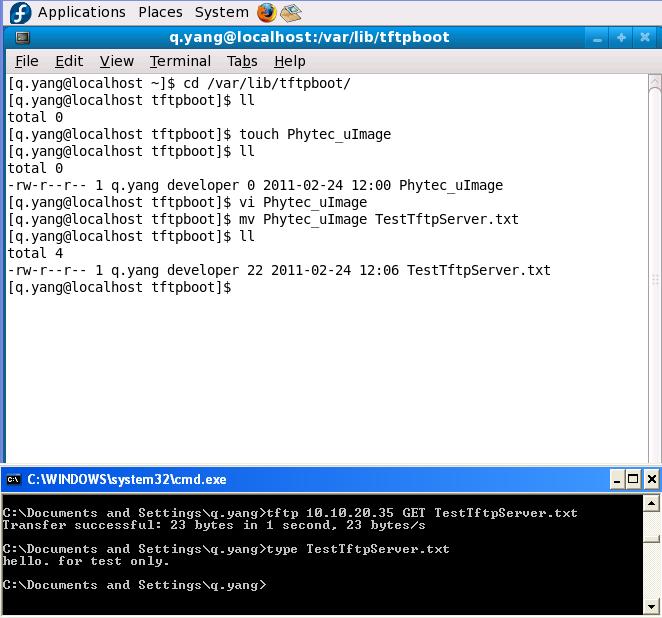
VARIFY TFTP SERVER IS WORKING FROM WINDOWS
--------------------------------------------
Using Tftp command under windows console
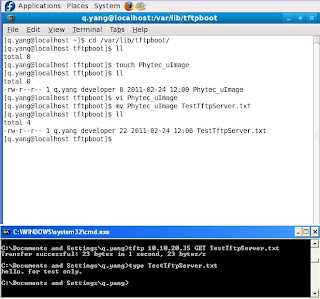


PERMISSION ERROR WHEN WRITE FILE INTO TFTP SERVER
--------------------------------------
#chmod 777 /var/lib/tftpboot


RESTART TFTP SERVER
---------------------
[root@localhost ltib-qs]# service xinetd restart


FAIL TO PUT FILE TO TFTP SERVER [4]
----------------------------------
check the /etc/xinetd.d/tftp file..

change:
server_args = -s /tftpboot

to:
server_args = -c -s /tftpboot

“-c” allows the creation of new file


##################################
# NFS Server set up under UBUNTU
###################################
[3] [2]
quentin@ubuntu:~/CodeSourcery/arm-2010q1$ sudo apt-get install nfs-kernel-server
............
............
quentin@ubuntu:~/CodeSourcery/arm-2010q1$ sudo vi /etc/exports

quentin@ubuntu:~/CodeSourcery/arm-2010q1$ sudo /etc/init.d/nfs-kernel-server start
* Exporting directories for NFS kernel daemon... [ OK ]
* Starting NFS kernel daemon [ OK ]

$ sudo service nfs-kernel-server start
 * Exporting directories for NFS kernel daemon...                                                                                                                 [ OK ]
 * Starting NFS kernel daemon                                                                                                                                     [ OK ]


#########################
# NFS Server set up
#######################
INSTALL NFS-UTILS RPCBIND RPM PACKAGE IF NOT INSTALLED
--------------------------------------------------------
#rpm -q nfs-utils To check whether nfs-utils installed.

INSTALL NFS-UTILS AND RPCBIND VIA YUM
-------------------------------------
Note:Not latest rpm is detected by yum due to yum package is old.
[root@localhost q.yang]# yum install nfs-utils rpcbind
Loaded plugins: refresh-packagekit
Setting up Install Process
Parsing package install arguments
Resolving Dependencies
--> Running transaction check
---> Package rpcbind.i386 0:0.1.4-14.fc9 set to be updated
---> Package nfs-utils.i386 1:1.1.2-2.fc9 set to be updated
--> Finished Dependency Resolution

Dependencies Resolved

=============================================================================
Package Arch Version Repository Size
=============================================================================
Installing:
nfs-utils i386 1:1.1.2-2.fc9 fedora 291 k
rpcbind i386 0.1.4-14.fc9 fedora 48 k

Transaction Summary
=============================================================================
Install 2 Package(s)
Update 0 Package(s)
Remove 0 Package(s)

Total download size: 339 k
Is this ok [y/N]: y
.....................
.....................

CREATE NFS SHARE
-----------------------
-- Option 1: --
You can edit /etc/exports file as follows:
[root@localhost ~]# vi /etc/exports
[q.yang@localhost ~]$ cat /etc/exports
/home/q.yang/Desktop 10.10.20.70(rw,insecure,sync,no_root_squash)
/home/q.yang/lpc3250/ltib-qs/rootfs 10.10.20.88(rw,no_root_squash,no_subtree_check,sync)
/home/q.yang/lpc3250/rootfs4Luke 10.10.20.90(rw,no_root_squash,no_subtree_check,sync)

-- Option 2: --
Using NFS GUI (need install yp-tools.i386 0:2.9-3 ypbind.i386 3:1.20.4-6.fc9 two packages)

START NFS, RPCBIND SERVICE
------------------------------
[root@localhost eclipse]# service rpcbind start
Starting rpcbind: [ OK ]
[root@localhost eclipse]# service nfs start
Starting NFS services: [ OK ]
Starting NFS quotas: [ OK ]
Starting NFS daemon: [ OK ]
Starting NFS mountd: [ OK ]

CHECK WHETHER NFS IS RUNNING
-----------------------------------
You should see portmapper and nfs running as below. If not try
#service nfs restart

[root@localhost ~]# rpcinfo -p
program vers proto port service
100000 4 tcp 111 portmapper
100000 3 tcp 111 portmapper
100000 2 tcp 111 portmapper
100000 4 udp 111 portmapper
100000 3 udp 111 portmapper
100000 2 udp 111 portmapper
100000 4 0 111 portmapper
100000 3 0 111 portmapper
100000 2 0 111 portmapper
100011 1 udp 1016 rquotad
100011 2 udp 1016 rquotad
100011 1 tcp 1019 rquotad
100011 2 tcp 1019 rquotad
100003 2 udp 2049 nfs
100003 3 udp 2049 nfs
100003 4 udp 2049 nfs
100021 1 udp 56276 nlockmgr
100021 3 udp 56276 nlockmgr
100021 4 udp 56276 nlockmgr
100003 2 tcp 2049 nfs
100003 3 tcp 2049 nfs
100003 4 tcp 2049 nfs
100021 1 tcp 39972 nlockmgr
100021 3 tcp 39972 nlockmgr
100021 4 tcp 39972 nlockmgr
100005 1 udp 54842 mountd
100005 1 tcp 59798 mountd
100005 2 udp 54842 mountd
100005 2 tcp 59798 mountd
100005 3 udp 54842 mountd
100005 3 tcp 59798 mountd


CHECK WHETHER NFS IS RUNNING FROM ANOTHER LINUX PC
--------------------------------------------------
On Linux PC B(10.10.20.70):
[root@localhost q.yang]# mount -t nfs 10.10.20.35:/home/q.yang/Desktop /mnt/nfstest/
[root@localhost q.yang]# ll /mnt/nfstest/
total 12
-rw-r--r-- 1 q.yang 500 5559 2010-06-03 17:23 gnome-terminal.desktop

On Linux PC A (10.10.20.35)
[q.yang@localhost ~]$ cat /etc/exports
/home/q.yang/Desktop 10.10.20.70(rw,insecure,sync,no_root_squash)


NFS TROUBLE SHOOTING
-------------------------------------
Fail to connect NFS due to firewall
-----------------------------------
1. Upgrade system-config-firewall/system-config-firewall-tui rpm package so that
correct /etc/sysconfig/iptables, /etc/sysconfig/iptables-config can be generated.
2. Disable firewall.

UPGRADE FIREWALL RPM PACKAGE MANUALLY
----------------------------------------
The files modified and generated as a result of system-config-firewall (system-config-firewall-1.2.16-3.fc9.noarch.rpm)
[root@localhost eclipse]# ll /etc/sysconfig/ |grep ip
-rw------- 1 root root 1753 2011-02-25 14:32 ip6tables-config
-rw------- 1 root root 1740 2011-02-25 14:32 iptables-config
-rw------- 1 root root 1776 2011-02-24 15:25 ip6tables-config.old
-rw------- 1 root root 1876 2011-02-24 15:10 ip6tables.old
-rw------- 1 root root 1763 2011-02-24 15:25 iptables-config.old
-rw------- 1 root root 1871 2011-02-24 15:10 iptables.old


YUM COULDN'T FIND LATEST FIREWALL RPM PACKAGE
[root@localhost eclipse]# yum install system-config-firewall
Loaded plugins: refresh-packagekit
updates | 2.6 kB 00:00
fedora | 2.4 kB 00:00
Setting up Install Process
Parsing package install arguments
Package system-config-firewall-1.2.7-1.fc9.noarch already installed and latest version
Nothing to do


[root@localhost eclipse]# rpm -U /home/q.yang/Download/system-config-firewall-1.2.16-3.fc9.noarch.rpm
warning: /home/q.yang/Download/system-config-firewall-1.2.16-3.fc9.noarch.rpm: Header V3 DSA signature: NOKEY, key ID df9b0ae9
error: Failed dependencies:
system-config-firewall-tui = 1.2.16-3.fc9 is needed by system-config-firewall-1.2.16-3.fc9.noarch
[root@localhost eclipse]# rpm -U /home/q.yang/Download/system-config-firewall-tui-1.2.16-3.fc9.noarch.rpm
warning: /home/q.yang/Download/system-config-firewall-tui-1.2.16-3.fc9.noarch.rpm: Header V3 DSA signature: NOKEY, key ID df9b0ae9
error: Failed dependencies:
system-config-firewall-tui = 1.2.7-1.fc9 is needed by (installed) system-config-firewall-1.2.7-1.fc9.noarch
[root@localhost eclipse]# rpm -q system-config-firewall-tui
system-config-firewall-tui-1.2.7-1.fc9.noarch

REMOVE EXISTING FIREWALL RPM PACKAGE
[root@localhost eclipse]# rpm -e system-config-firewall-tui
error: Failed dependencies:
system-config-firewall-tui = 1.2.7-1.fc9 is needed by (installed) system-config-firewall-1.2.7-1.fc9.noarch
[root@localhost eclipse]# rpm -e system-config-firewall
[root@localhost eclipse]# rpm -e system-config-firewall-tui

MANUALLY INSTALL FIREWALL RPM PACKAGE
[root@localhost eclipse]# rpm -ivh /home/q.yang/Download/system-config-firewall-1.2.16-3.fc9.noarch.rpm
warning: /home/q.yang/Download/system-config-firewall-1.2.16-3.fc9.noarch.rpm: Header V3 DSA signature: NOKEY, key ID df9b0ae9
error: Failed dependencies:
system-config-firewall-tui = 1.2.16-3.fc9 is needed by system-config-firewall-1.2.16-3.fc9.noarch
[root@localhost eclipse]# rpm -ivh /home/q.yang/Download/system-config-firewall-tui-1.2.16-3.fc9.noarch.rpm
warning: /home/q.yang/Download/system-config-firewall-tui-1.2.16-3.fc9.noarch.rpm: Header V3 DSA signature: NOKEY, key ID df9b0ae9
Preparing... ########################################### [100%]
1:system-config-firewall-########################################### [100%]
[root@localhost eclipse]# rpm -ivh /home/q.yang/Download/system-config-firewall-1.2.16-3.fc9.noarch.rpm
warning: /home/q.yang/Download/system-config-firewall-1.2.16-3.fc9.noarch.rpm: Header V3 DSA signature: NOKEY, key ID df9b0ae9
Preparing... ########################################### [100%]
1:system-config-firewall ########################################### [100%]


CHECK FIREWALL FROM COMMAND LINE
-------------------------------------
[root@localhost eclipse]# iptables -L |more
Chain INPUT (policy ACCEPT)
target prot opt source destination
ACCEPT all -- anywhere anywhere state RELATED,ESTABLISHED
ACCEPT icmp -- anywhere anywhere
ACCEPT all -- anywhere anywhere
ACCEPT tcp -- anywhere anywhere state NEW tcp dpt:nfs
ACCEPT udp -- anywhere anywhere state NEW udp dpt:nfs
ACCEPT udp -- anywhere anywhere state NEW udp dpt:netbios-ns
ACCEPT udp -- anywhere anywhere state NEW udp dpt:netbios-dgm
ACCEPT tcp -- anywhere anywhere state NEW tcp dpt:netbios-ssn
ACCEPT tcp -- anywhere anywhere state NEW tcp dpt:microsoft-ds
...................
..................


IF NFS FAILURE IS DUE TO OLD NFS-UTILS RPCBIND RPM PACKAGE
----------------------------------------------------------

REMOVE AND INSTALL NEW PACKAGE VIA YUM
-----------------------------------------

[root@localhost eclipse]# yum erase rpcbind
Loaded plugins: refresh-packagekit
Setting up Remove Process
updates | 2.6 kB 00:00
fedora | 2.4 kB 00:00
Resolving Dependencies
--> Running transaction check
---> Package rpcbind.i386 0:0.1.7-1.fc9 set to be erased
--> Processing Dependency: rpcbind for package: nfs-utils
--> Processing Dependency: rpcbind for package: ypbind
--> Running transaction check
---> Package nfs-utils.i386 1:1.1.2-2.fc9 set to be erased
---> Package ypbind.i386 3:1.20.4-6.fc9 set to be erased
--> Processing Dependency: ypbind for package: yp-tools
--> Running transaction check
---> Package yp-tools.i386 0:2.9-3 set to be erased
--> Finished Dependency Resolution

Dependencies Resolved

=============================================================================
Package Arch Version Repository Size
=============================================================================
Removing:
rpcbind i386 0.1.7-1.fc9 installed 90 k
Removing for dependencies:
nfs-utils i386 1:1.1.2-2.fc9 installed 555 k
yp-tools i386 2.9-3 installed 151 k
ypbind i386 3:1.20.4-6.fc9 installed 64 k

Transaction Summary
=============================================================================
Install 0 Package(s)
Update 0 Package(s)
Remove 4 Package(s)

Is this ok [y/N]:
Downloading Packages:
Running rpm_check_debug
Running Transaction Test
Finished Transaction Test
Transaction Test Succeeded
Running Transaction
Shutting down NFS mountd: [ OK ]
Shutting down NFS daemon: [ OK ]
Shutting down NFS quotas: [ OK ]
Shutting down NFS services: [ OK ]
Starting NFS services: [ OK ]
Starting NFS quotas: [ OK ]
Starting NFS daemon: [ OK ]
Starting NFS mountd: [ OK ]
Stopping RPC idmapd: [ OK ]
Starting RPC idmapd: [ OK ]
Erasing : nfs-utils ######################### [1/4]
warning: /var/lib/nfs/state saved as /var/lib/nfs/state.rpmsave
warning: /var/lib/nfs/etab saved as /var/lib/nfs/etab.rpmsave
Erasing : rpcbind ######################### [2/4]
Erasing : yp-tools ######################### [3/4]
Erasing : ypbind ######################### [4/4]

Removed: rpcbind.i386 0:0.1.7-1.fc9
Dependency Removed: nfs-utils.i386 1:1.1.2-2.fc9 yp-tools.i386 0:2.9-3 ypbind.i386 3:1.20.4-6.fc9
Complete!


[root@localhost eclipse]# rpm -q rpcbind
package rpcbind is not installed
[root@localhost eclipse]# yum install nfs-utils rpcbind
Loaded plugins: refresh-packagekit
Setting up Install Process
Parsing package install arguments
Resolving Dependencies
--> Running transaction check
---> Package rpcbind.i386 0:0.1.4-14.fc9 set to be updated
---> Package nfs-utils.i386 1:1.1.2-2.fc9 set to be updated
--> Finished Dependency Resolution

Dependencies Resolved

=============================================================================
Package Arch Version Repository Size
=============================================================================
Installing:
nfs-utils i386 1:1.1.2-2.fc9 fedora 291 k
rpcbind i386 0.1.4-14.fc9 fedora 48 k

Transaction Summary
=============================================================================
Install 2 Package(s)
Update 0 Package(s)
Remove 0 Package(s)

Total download size: 339 k
Is this ok [y/N]: y